Validate and Use Workload Orchestrator
Estimated reading time: 1 minute
Now that you have configured the basic Workload Orchestrator components, explore the settings and additional features and options within the Workload Orchestrator platform.
Workload Orchestrator Dashboard
The following Dashboard (specific to a Project) becomes available after a Company and a Project have been configured, along with the other configurations described in this Workload Orchestrator Getting Started Guide. This dashboard becomes your centralized view for visualizing project status and determining if devices are sending data.
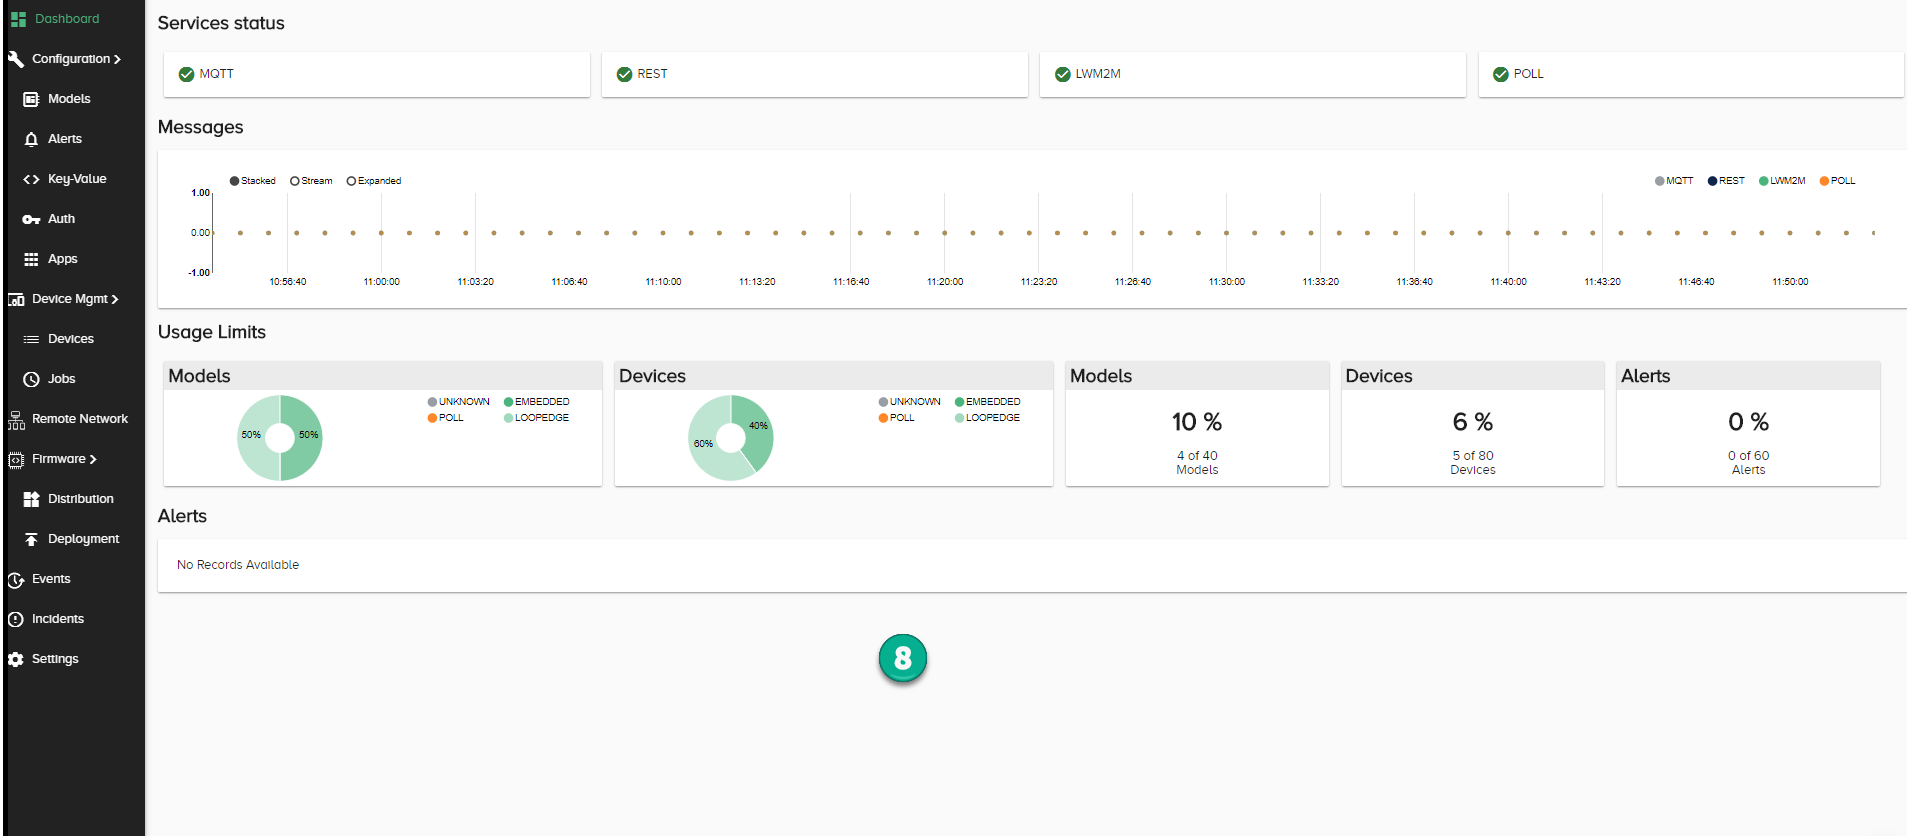
Example of a Project Dashboard after Workload Orchestrator components have been configured
The path displayed at the top of the Workload Orchestrator window indicates the project.
Example:
company1/Manufacturing1
- Navigation Panel – Use this area to access Workload Orchestrator configurations.
- Product Menu – Select other licensed Workload Orchestrator products, such as Workload Orchestrator Data Enricher (LDE), Workload Orchestrator License Manager (LLM), and Workload Orchestrator Insights (LI).
- Company Access – Return to the menu that lists Companies configured in your environment.
- Navigation Toggle - Contract/Expand the Navigation Panel.
- Company Project – Open the company’s project list to either select an existing Project or add a new Project.
- Account Management – Modify account, password, and authenticator. View or log out of all sessions. View applications and log entries. Also, go here to log out of the current platform session.
- Ask Questions/Give Feedback – Click the icon to open a discussion with HPE experts. This is not an immediate-response bot. A real human will respond, typically in a few hours.
- Project Dashboard Overview – Identify services’ status, messages, usage limits, and alerts in a single pane-of-glass view.
Pay attention to the browser tabs, particularly when working on Account Management tasks. Certain actions will open new browser tabs.